
Command line interface, or the terminal, is an essential tool for any Super user. While it may seem intimidating at first, the command line is a powerful tool that allows for advanced navigation and control of your system.
In this post, we will go over the basics of the command line and some essential commands every Linux user should know
In this guide, we are assuming you have already successfully deployed and installed your own copy of Linux.
Contents:
- What is the best way to learn Linux commands?
- Introduction to the Linux command line interface
- Opening the terminal
- Understanding basic Linux commands and syntax
- Navigating the file system from the command line
- ls command
- cd command
- pwd command
- mkdir command
- rmdir command
- cp command
- mv command
- rm command
- Creating, moving, copying, and deleting files and directories
- Creating Files
- Moving Files
- Copying Files
- Deleting Files
- Creating Directories
- Moving Directories
- Copying Directories
- Deleting Directories
- Editing text files using nano or vi
- Running programs and scripts from the command line
- Understanding the Linux file permissions system
- Managing processes from the command line
- Mastering Search with grep: A Beginner’s Guide to Linux File Searching
- Customizing the shell environment with bash scripts
- Using pipes and redirection to manipulate output
- What 5 commands a Linux admin should know?
What is the best way to learn Linux commands?
The best way to learn Linux commands is to get hands-on experience through practical usage and experimentation. Some ways to achieve this include:
- Using a virtual machine or live CD: This allows you to test out Linux commands without affecting your main operating system.
- Reading manual pages (man pages): These are built-in documentation pages that provide comprehensive information about each command.
- Practicing with interactive tutorials: There are many online interactive tutorials that guide you through various commands and show you the output.
- Enrolling in online courses: Online courses can provide structured learning and lessons, along with quizzes and projects to help you practice and solidify your understanding.
- Participating in online communities: Joining forums and online communities, such as Reddit or Stack Overflow, can provide support and help you find solutions to any challenges you may encounter.
By combining these methods and actively seeking out opportunities to learn and practice, you can quickly become proficient with Linux commands and navigate the Linux operating system with ease.
Introduction to the Linux command line interface
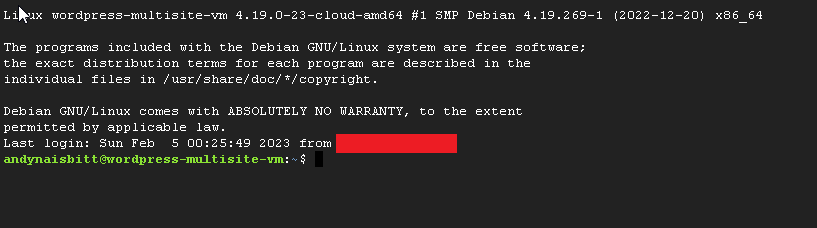
Opening the terminal
First, let’s start by opening the terminal.
On most Linux distributions, you can access the terminal by pressing the keyboard shortcut Ctrl + Alt + T or by searching for “terminal” in your applications menu.

Once you have the terminal open, you will be presented with a prompt, usually denoted by a dollar sign ($).

This is where you can enter commands.
Understanding basic Linux commands and syntax
Linux commands follow a basic syntax structure, which includes the following components:
- Command name: The name of the command to be executed, such as ls, cd, or pwd.
- Options: Options are used to specify how the command should be executed. They are usually denoted by a dash (-) followed by a single letter. For example, the -l option is used to display a long list of files in the ls command.
- Arguments: Arguments specify the target or targets of the command. For example, in the ls command, the argument could be a directory name, and the command would list the contents of that directory.
Example of basic Linux syntax:
command -option argumentIn this example, “command” is the name of the command to be executed, “-option” specifies how the command should be executed, and “argument” is the target of the command. This is the basic structure of a Linux command and is used for many of the common Linux commands, such as ls, cd, and pwd.
Another example of basic Linux syntax:
command1 | command2In this example, “command1” is executed first, and its output is then passed as input to “command2”. The pipe symbol (|) is used to pass the output of one command as input to another. This allows for complex commands to be built from multiple simpler commands. For example, you could use the following command to display the contents of a directory, sorted by file size:
ls -l | sort -nk 5This example demonstrates the power of the Linux command line interface, as complex tasks can be easily performed with a series of simple commands.
Another basic Linux syntax example:
command1 && command2In this example, “command1” and “command2” are executed in sequence, with “command2” only executed if “command1” succeeds (returns a zero exit status). The double ampersand (&&) is used to run multiple commands in sequence, with the subsequent commands only executed if the previous commands succeed. For example, you could use the following command to create a new directory and then navigate into it:
mkdir newdir && cd newdirThis syntax is useful for executing a series of commands, where you only want the subsequent commands to run if the first command succeeds. In this case, the new directory is only created if the “mkdir” command succeeds, and you only navigate into the new directory if the “cd” command succeeds.
These are just a few examples of the basic syntax used in the Linux command line interface. With a solid understanding of these basic commands and syntax, you can begin to perform complex tasks with ease.
In this article, we’ll explore the fundamentals of the Linux command line, including the syntax and usage of common Linux commands. By the end of this article, you will have a good understanding of how to navigate the file system, manipulate files and directories, and run programs from the command line.
- Navigating the file system: The “cd” command is used to change the current directory in the file system. For example, “cd /” will take you to the root directory, while “cd ~/Downloads” will take you to the Downloads directory in your home directory.
- Listing files and directories: The “ls” command is used to list the contents of a directory. You can add the “-l” option to display a long list of information about each file, including permissions, ownership, and file size.
- Creating, moving, and deleting files: The “touch” command is used to create a new file, while the “mv” command is used to move or rename files. The “rm” command is used to delete files, but be careful as this command cannot be undone!
- Viewing and editing text files: The “cat” command is used to view the contents of a text file, while the “nano” and “vi” text editors are used to edit text files from the command line.
- Running programs and scripts: The “./” operator is used to run executable files and shell scripts from the command line. For example, if you have a shell script named “myscript.sh”, you can run it by typing “./myscript.sh”.
- Understanding file permissions: Linux uses a system of file permissions to control who can access and modify files and directories. The “chmod” command is used to change file permissions, and the “ls -l” command can be used to view the permissions of a file.
By mastering these basic Linux commands and syntax, you’ll be well on your way to becoming a confident Linux user. Whether you’re a beginner or an experienced user, this article will provide you with a solid foundation for working with Linux systems, and will help you get the most out of the powerful tools available in the Linux command line interface.
Navigating the file system from the command line
Navigating the file system from the command line is a fundamental skill for Linux users, developers, and system administrators. Understanding basic file system navigation commands is essential for managing files, directories, and permissions in a Linux environment. In this article, we’ll explore some of the most commonly used commands for navigating the file system from the command line, with code examples to help you get started.
ls command
The ls command is used to list the contents of a directory. For example, to list the contents of the current directory, you would use the following command:
ls
To list the contents of a different directory, specify the directory path after the ls command. For example:
ls /var/log
cd command
The cd command is used to change the current working directory. For example, to change to the /var directory, you would use the following command:
cd /var
pwd command
The pwd command is used to display the full path of the current working directory. For example:
pwd
mkdir command
The mkdir command is used to create a new directory. For example, to create a directory called newdir, you would use the following command:
mkdir newdir
rmdir command
The rmdir command is used to remove an empty directory. For example, to remove the newdir directory, you would use the following command:
rmdir newdir
cp command
The cp command is used to copy a file or directory. For example, to copy the file1 to a new file called file2, you would use the following command:
cp file1 file2
mv command
The mv command is used to move or rename a file or directory. For example, to rename the file1 to file2, you would use the following command:
mv file1 file2
rm command
The rm command is used to remove a file. For example, to remove the file2, you would use the following command:
rm file2
In conclusion, these are just a few of the basic Linux file system navigation commands. By mastering these commands, you’ll have the foundational skills needed to manage files, directories, and permissions in a Linux environment.
Creating, moving, copying, and deleting files and directories
Linux is a powerful and versatile operating system that provides many tools for managing files and directories. The command line interface (CLI) is one of the most efficient and effective ways to work with the file system. In this article, we’ll explore the basics of creating, moving, copying, and deleting files and directories in Linux using the CLI.
Creating Files
To create a new file in Linux, you can use the touch command. This command creates an empty file with the specified name. For example, to create a file named “newfile.txt”, you would run the following command:
touch newfile.txt
Moving Files
To move a file in Linux, you can use the mv command. This command allows you to rename a file or move it to a different directory. For example, to move a file named “oldfile.txt” to a directory named “newdir”, you would run the following command:
mv oldfile.txt newdir/
Copying Files
To copy a file in Linux, you can use the cp command. This command creates a duplicate of the file in a different location. For example, to copy a file named “originalfile.txt” to a directory named “copyfolder”, you would run the following command:
cp originalfile.txt copyfolder/Deleting Files
To delete a file in Linux, you can use the rm command. This command permanently removes the file from the file system. For example, to delete a file named “oldfile.txt”, you would run the following command:
rm oldfile.txt
Creating Directories
To create a new directory in Linux, you can use the mkdir command. This command creates a new directory with the specified name. For example, to create a directory named “newdir”, you would run the following command:
mkdir newdir
Moving Directories
To move a directory in Linux, you can use the mv command. This command allows you to rename a directory or move it to a different location. For example, to move a directory named “olddir” to a directory named “newlocation”, you would run the following command:
mv olddir newlocation/
Copying Directories
To copy a directory in Linux, you can use the cp command with the -r option. This command creates a duplicate of the directory, including all its contents. For example, to copy a directory named “originaldir” to a directory named “copyfolder”, you would run the following command:
cp -r originaldir copyfolder/Deleting Directories
To delete a directory in Linux, you can use the rm command with the -r option. This command permanently removes the directory and all its contents from the file system. For example, to delete a directory named “olddir”, you would run the following command:
rm -r olddir
In conclusion, these are the basics of creating, moving, copying, and deleting files and directories in Linux using the CLI. By mastering these commands, you can become more efficient and effective in managing the file system from the command line.
Editing text files using nano or vi
In Linux, nano and vi are two of the most commonly used text editors. Both of them have their own advantages and disadvantages, and it ultimately comes down to personal preference when choosing one over the other.
Nano is a simple and easy-to-use text editor that is great for beginners. It has a user-friendly interface and includes helpful on-screen instructions. To start nano, simply open a terminal window and type in “nano [filename]”.
nano [filename]This will open the specified file in nano, where you can make your desired edits. Nano also provides keyboard shortcuts that allow you to perform various tasks, such as saving the file (CTRL + O) and exiting (CTRL + X).
Vi, on the other hand, is a more powerful text editor that is favored by experienced Linux users. Vi is known for its versatility, as it can be used for basic text editing as well as more complex tasks such as programming. To start vi, simply open a terminal window and type in “vi [filename]”. This will open the specified file in vi. One of the key differences between nano and vi is that vi operates in two modes: command mode and insert mode. In command mode, you can use various commands to navigate and manipulate the file, while in insert mode you can actually edit the text. To switch between modes, simply press the “Esc” key to return to command mode, and then press “i” to switch back to insert mode.
In conclusion, nano and vi are both valuable tools for editing text files in Linux. Whether you are a beginner or an experienced user, each text editor offers unique features and capabilities. It’s important to choose the one that best fits your needs and to become familiar with its commands and syntax. With a little practice, you will be able to efficiently and effectively edit text files in Linux.
Running programs and scripts from the command line
Running programs and scripts from the command line in Linux is a powerful and efficient way to perform various tasks in your operating system. Whether you’re a beginner or an experienced Linux user, it’s important to have a solid understanding of how to run programs and scripts from the command line. In this article, we’ll take a closer look at the basics of executing programs and scripts in Linux, along with some code syntax usage examples.
The first step to running programs and scripts in Linux is to navigate to the directory that contains the file you want to execute. You can use the cd command to change to the desired directory. For example, to navigate to the /bin directory, you can type cd /bin.
Once you’re in the directory that contains the program or script you want to run, you can execute it by typing its name followed by ./ and the file name. For example, to run a script named script.sh, you would type ./script.sh.
If you’re trying to run a program and you get a message that says the file is not executable, you may need to make it executable first. You can do this by using the chmod +x command followed by the file name. For example, to make script.sh executable, you would type chmod +x script.sh.
You can also run a program or script with specific parameters. For example, you can run the script script.sh with the parameter -h by typing ./script.sh -h.
If you’re running a program or script that requires root privileges, you can use the sudo command to execute it with elevated permissions. For example, to run the script script.sh as root, you would type sudo ./script.sh.
In conclusion, running programs and scripts from the command line in Linux is a key skill for anyone looking to become proficient with the operating system. Whether you’re a beginner or an experienced user, understanding the basics of executing programs and scripts is essential. With the right knowledge and a few key commands, you’ll be able to run programs and scripts in Linux like a pro!
Understanding the Linux file permissions system
The Linux file permission system is one of the core components of the Linux operating system and is essential for maintaining the security of data and files. Understanding how to manage file permissions is an important part of being an effective Linux user. In this article, we will explore the basics of the Linux file permission system and provide code syntax usage examples for managing file permissions from the command line.
File Permission System The Linux file permission system assigns unique permissions to each file and directory in the system. These permissions determine who can access, modify, and execute the files and directories. There are three types of permissions: read, write, and execute. Each file and directory can have separate permissions assigned to the owner, the group, and others.
File and Directory Permissions The Linux file permission system uses three digits to represent the permissions for each file and directory. The first digit represents the permissions assigned to the owner of the file, the second digit represents the permissions assigned to the group, and the third digit represents the permissions assigned to others.
Code Syntax Usage To manage the file permissions from the command line, you can use the chmod command. The chmod command allows you to change the permissions for files and directories. The syntax for the chmod command is as follows:
chmod [permission] [file or directory]
The permission is represented by a three digit number. To assign read, write, and execute permissions to the owner, you would use 7. To assign read and write permissions to the group, you would use 6. And to assign execute permission to others, you would use 1.
Examples Here are some code syntax usage examples for managing file permissions from the command line:
- To give read, write, and execute permissions to the owner of a file:
chmod 744 file.txt
- To give read and write permissions to the group and others:
chmod 660 file.txt
- To give execute permission to the group and others:
chmod 001 file.txt
the file permission system is a critical component of the Linux operating system and it is important for Linux users to understand how to manage file permissions from the command line. With the chmod command, you can easily manage the file permissions for files and directories in your system. By understanding the basics of the Linux file permission system and how to manage permissions from the command line, you can help ensure the security of your data and files.
Advanced Beginners in Linux, keep reading….
Managing processes from the command line
Here are some of the basic commands you need to know to manage processes in Linux:
- ps: The ps command is used to display information about the current running processes. It shows the process ID, the user running the process, and the state of the process. For example, “ps -ef” displays information about all the processes running on the system.
- top: The top command is used to show real-time information about system processes. It provides information such as the process ID, the percentage of CPU and memory usage, and the user running the process. For example, “top” will display the list of processes in real-time.
- kill: The kill command is used to stop or terminate a process. The process ID is required to use this command. For example, “kill <pid>” terminates the process with the specified process ID.
- killall: The killall command is used to terminate all processes with the specified name. For example, “killall firefox” terminates all firefox processes.
- pkill: The pkill command is similar to the killall command, but it uses the process name instead of the process ID to terminate the process. For example, “pkill firefox” terminates the firefox process.
- nice: The nice command is used to set the priority of a process. It allows the user to run a process with a lower or higher priority, affecting the amount of CPU time the process receives. For example, “nice -n 10 <command>” runs the specified command with a lower priority.
- renice: The renice command is used to change the priority of an existing process. For example, “renice -n 10 <pid>” changes the priority of the process with the specified process ID to a lower priority.
Understanding the basic commands to manage processes in Linux is essential for efficient system administration. These commands allow you to control and monitor system processes, ensuring the smooth functioning of your system. As you become more familiar with these commands, you can explore more advanced options and techniques to manage processes in Linux.
Mastering Search with grep: A Beginner’s Guide to Linux File Searching
he command line interface in Linux offers many tools to simplify and streamline tasks, including searching for files and information. One such tool is grep, a powerful tool for searching for patterns in text files.
Grep is short for “Global Regular Expression Print” and it works by searching for a specified pattern in one or more text files. The tool is incredibly useful for searching for specific information within large files or across multiple files.
Here are some basic syntax and usage examples for grep:
- Search for a single pattern in a file:
grep 'pattern' file.txt
- Search for a pattern in multiple files:
grep 'pattern' file1.txt file2.txt file3.txt
- Search for a pattern in all files within a directory:
grep 'pattern' *
- Search for a pattern while ignoring case:
grep -i 'pattern' file.txt
- Search for a pattern while displaying line numbers:
grep -n 'pattern' file.txt
- Search for a pattern and display only the matching parts of the line:
grep -o 'pattern' file.txt
- Search for a pattern in all files within a directory, including subdirectories:
grep -r 'pattern' .
In addition to these basic examples, there are many other options and flags available for grep to customize and refine your searches. By mastering grep, you can quickly and easily search for the information you need within your Linux file system.
Whether you’re a beginner or an experienced Linux user, understanding and utilizing the grep tool is an important aspect of managing your files and information from the command line. Try incorporating grep into your workflow and see how it can simplify and streamline your searches.”
Customizing the shell environment with bash scripts
One of the most important tools in the Linux environment is the bash shell, which is a powerful command-line interface that provides users with a way to interact with the operating system.
One of the best ways to take advantage of the bash shell and make the most of your Linux environment is by customizing it with bash scripts. Bash scripts are small programs that are written in the bash scripting language, and they provide users with a way to automate complex tasks and simplify common operations. With bash scripts, you can accomplish tasks such as starting and stopping services, configuring network settings, and even automating backups and other system maintenance tasks.
To write a bash script, you simply need to open a text editor and enter a series of commands into the file. The syntax for bash scripts is relatively straightforward and easy to learn, making it a great option for both beginner and advanced users. Some of the most commonly used syntax elements in bash scripts include variables, conditional statements, and loops, which allow you to control the flow of your script and interact with the user.
Here are a few code syntax usage examples to help you get started with bash scripts in Linux:
- Variables:
#!/bin/bash

# Declare a variable
greeting="Hello, world!"

# Print the variable
echo $greeting
- Conditional statements:
#!/bin/bash

# Ask the user for input
echo "Enter a number between 1 and 10:"
read number

# Check the value of the input
if [ $number -lt 5 ]; then
  echo "The number is less than 5."
else
  echo "The number is greater than or equal to 5."
fi
- Loops:
#!/bin/bash

# Loop through numbers from 1 to 10
for i in {1..10}; do
  echo $i
done
In conclusion, customizing the shell environment with bash scripts is a powerful way to automate and simplify many common tasks in the Linux environment. Whether you are a beginner or an advanced user, learning how to write bash scripts can help you become more productive and efficient in your work. With a few simple examples and the right tools, you can quickly master the art of bash scripting and make the most of your Linux environment.
Using pipes and redirection to manipulate output
Pipes are represented by the “|” symbol and are used to pass the output of one command as input to another. For example, you can use the “ls” command to list the contents of a directory and pipe the output to the “grep” command to search for a specific file:
ls | grep example.txt
This will search the output of the “ls” command for the string “example.txt” and return only the matching lines.
Redirection is another important aspect of the Linux command line. It allows you to control the input and output of commands by specifying files or other sources of input and output. For example, you can redirect the output of a command to a file:
ls > filelist.txt
This will write the output of the “ls” command to the file “filelist.txt”.
There are several types of redirection in Linux, including:
- Standard Output (“>”) – redirects the output of a command to a file
- Standard Input (“<“) – takes input from a file and passes it to a command
- Standard Error (“>&2”) – redirects the error output of a command to a file
By understanding these concepts, you can greatly increase your ability to manipulate output from commands and automate tasks on the Linux command line. It’s also worth noting that many other Unix-based operating systems, such as macOS, use similar syntax for pipes and redirection.
What 5 commands an IT admin should know by the end of this guide
One of the most basic commands is the “pwd” command, which stands for “print working directory.” This command will tell you your current location in the file system. Try entering “pwd” into the terminal and hitting enter.
Another essential command is “ls”, which stands for “list.” This command will show you the files and folders in your current directory. You can also use “ls -l” to see a detailed view of the files and folders, including their permissions, ownership and size.
Navigating through the file system is easy with the “cd” command, which stands for “change directory.” To move to a different directory, simply enter “cd” followed by the path of the directory you wish to move to. For example, “cd /home/username/documents” will take you to the “documents” folder in your home directory.
To move up one directory level, you can use “cd ..”
Another important command is “cp” which stands for “copy.” This command is used to copy files and folders. The basic format is “cp [source] [destination].” For example, “cp /home/username/documents/file.txt /home/username/documents/backup” will copy the file.txt from documents folder to backup folder
The “mv” command is used to move or rename files and folders. The basic format is “mv [source] [destination].” For example, “mv /home/username/documents/file.txt /home/username/documents/backup” will move the file.txt from documents folder to backup folder
These are just a few of the many commands available in the Linux terminal. With some practice and exploration, you’ll find that the command line is a powerful tool that can greatly increase your productivity and control over your system.
Join Our Community!
🌟 Get exclusive insights and the latest IT tools and scripts, straight to your inbox.
🔒 We respect your privacy. Unsubscribe at any time.